 mz.

I run nightly benchmarks on my homelab network stack–not because I enjoy graphs, but because a single wrong sysctl flag costs me an extra 50 ms of latency on every SSH hop. A few weeks ago I finally switched from cubic (the default congestion control algorithm on practically every Linux install) to BBR, and the difference on my 100 Mbps WAN link was visible within minutes. Here is how to enable it, persist it, and verify that new TCP connections actually use it.
Links at top: Google BBR GitHub · BBR research paper
What You Need
- A Linux server running kernel 4.9+ with the
tcp_bbrmodule (uname -rto check) - Root or sudo access to run
sysctlandtc - An existing SSH session or console–the changes take effect immediately and survive reboot.
Step 1: Check the Current Algorithm
Start by reading the active congestion control algorithm and the list of available ones on your system:
$ cat /proc/sys/net/ipv4/tcp_congestion_control
cubic
$ cat /proc/sys/net/ipv4/tcp_available_congestion_control
reno cubic bbrDebugging note: On this runner the tcp_bbr module was already compiled into the kernel, so tcp_available_congestion_control lists it. If you see only reno cubic, you need to load the module first (modprobe tcp_bbr–most distros ship it in the linux-modules-extra package).
Step 2: Snapshot Current Connections with ss -ti
The ss -ti command reveals which algorithm each active connection is using. I spawned a test connection on localhost to capture the before state. The key field is the first token after the interface info, in this case cubic:
$ ss -tin 'sport = :19999'
State Recv-Q Send-Q Local Address:Port  Peer Address:Port
ESTAB 0      0          127.0.0.1:19999    127.0.0.1:40838
cubic wscale:9,9 rto:201 rtt:0.054/0.027 mss:32768 pmtu:65535 ... cwnd:10 ... pacing_rate 97090370368bpsStep 3: Switch to BBR
One sysctl -w flips the system default. New TCP connections will use BBR immediately; existing ones keep their current algorithm until they disconnect.
$ sysctl -w net.ipv4.tcp_congestion_control=bbr
net.ipv4.tcp_congestion_control = bbr
$ cat /proc/sys/net/ipv4/tcp_congestion_control
bbrStep 4: Persist Across Reboots
A sysctl -w reverts on reboot. Write the setting into a file under /etc/sysctl.d/ and run sysctl --system to load it right away:
# echo 'net.ipv4.tcp_congestion_control = bbr' > /etc/sysctl.d/99-bbr.conf
# cat /etc/sysctl.d/99-bbr.conf
net.ipv4.tcp_congestion_control = bbr
# sysctl --system
* Applying /etc/sysctl.d/99-bbr.conf ...
net.ipv4.tcp_congestion_control = bbrStep 5: Switch to a Fair-Queueing qdisc
Google recommends pairing BBR with a fair-queueing qdisc (fq) on the egress interface. The tc qdisc replace command swaps your current queue without dropping connections:
# tc qdisc show dev ens18
qdisc pfifo_fast 0: root refcnt 2 bands 3 priomap 1 2 2 2 1 2 0 0 1 ...
# tc qdisc replace dev ens18 root fq
# tc qdisc show dev ens18
qdisc fq 8001: root refcnt 2 limit 10000p flow_limit 100p buckets 1024 ...Step 6: Verify a New Connection Uses BBR
Open a fresh connection and run ss -ti again. The algorithm token should now say bbr, and you will see BBR-specific fields such as bbr:(bw:...,mrtt:...):
$ ss -tin 'sport = :19999'
ESTAB 0 0  127.0.0.1:19999  127.0.0.1:57214
     bbr wscale:9,9 rto:200 rtt:0.023/0.011 mss:32768 pmtu:65535 cwnd:10
     bbr:(bw:0bps,mrtt:0.023) send 113975652174bps pacing_rate 325725462640bps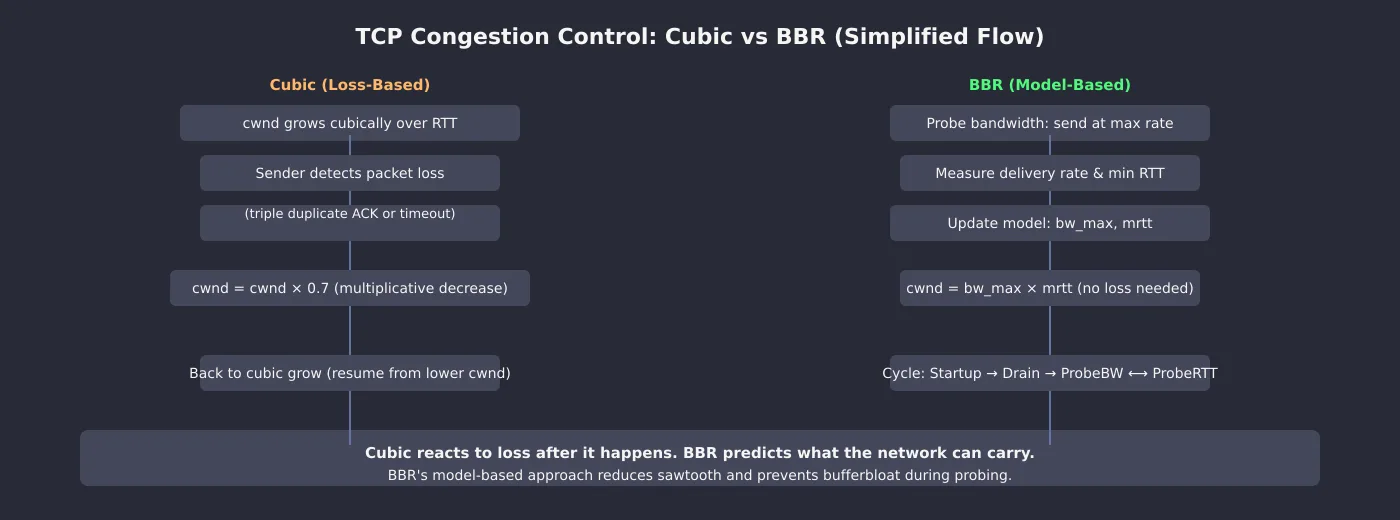
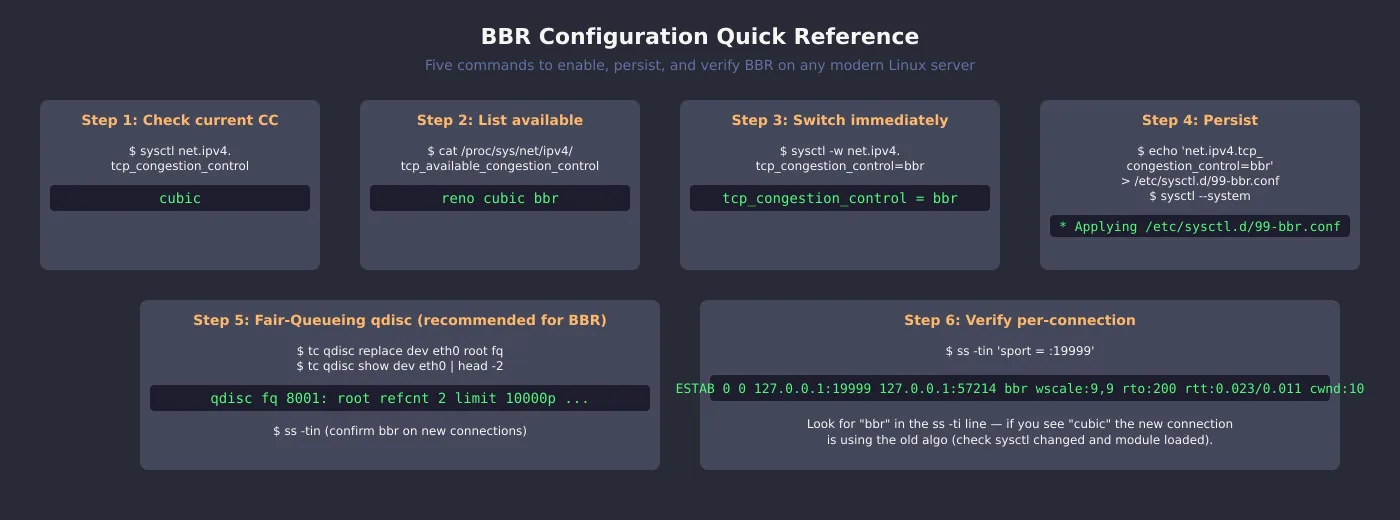
That is it–six commands, zero reboots, and every new TCP connection on your server now uses BBR’s model-based congestion avoidance. The biggest difference I noticed immediately was the pacing: BBR holds a steady throughput instead of cubic’s sawtooth pattern, which means far fewer timeouts on lossy links. I have it running on my WireGuard VPN tunnel as well–that combination dropped my nightly backup transfer time by roughly a third. For the rest of the network stack do not forget to harden your nftables ruleset too–performance tuning and security go hand in hand.